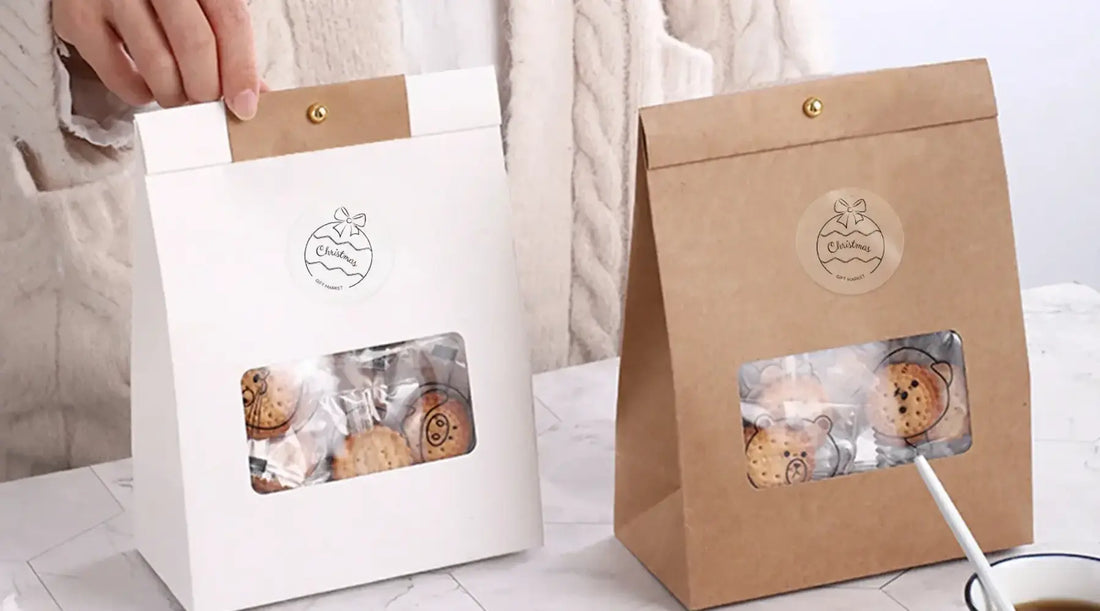
How to Make Clear and Transparent Stickers in 4 Easy Steps

Creating your own clear and transparent stickers can be a fun and rewarding project. Whether you want to personalize your belongings, make custom labels, or even start a small business, making these stickers at home is easier than you might think. With the right materials and tools, you can produce professional-looking stickers in just a few simple steps. In this guide, we'll walk you through the process of making transparent stickers. Let's get started!
What Are Transparent Stickers?
Transparent stickers are exactly what they sound like—stickers that have a see-through background. Unlike regular stickers with opaque backgrounds, transparent ones allow whatever surface you stick them on to show through. This makes them versatile and visually appealing for various uses.
These stickers are made using special transparent sticker paper and can be printed with any design, logo, or text you like. The result is a sleek and modern look that can make your items stand out. They’re often used for branding, decorating personal items, or organizing spaces because they blend seamlessly with the surfaces they're applied to.
Applications of Transparent Stickers
Transparent stickers are incredibly versatile and can be used in many ways. Here are a few scenarios where they come in handy:
- Branding: Businesses use transparent stickers to add logos and brand names to products without covering up the item's original design.
- Personal Items: Individuals love using these stickers to customize their laptops, phone cases, water bottles, and more.
- Home Organization: Clear stickers can label pantry jars, storage bins, and other household items while keeping a clean and uniform look.
- Crafts and Scrapbooking: Crafters use transparent stickers to add decorative elements to their projects without adding bulk or distracting from the overall design. For example, you can print stickers for handmade candles, soaps, lotions, and other DIY products to give them a creative touch.
Now that you know what transparent stickers are and how they can be used, let's dive into the steps to create your own.
How to Make Clear Transparent Stickers in 4 Steps
Before we get into the specific steps, it's important to understand that making clear and transparent stickers involves a few key steps: preparing materials, choosing or designing a template, setting up your printer, and finally, printing the stickers. Let’s break down each step in detail.
Step 1 Prepare Materials and Tools
To start, you’ll need to gather all the necessary materials and tools. Here's a list to help you get prepared:
1. Thermal Printer
A thermal printer is highly recommended for its ease of use and portability, which allows you to print at home no matter when you desire to print a label or sticker. These printers are compact and efficient, making them ideal for quick and hassle-free printing tasks. When shopping for a thermal printer, look for brands known for reliability and user-friendly features. Speaking to this, MUNBYN is a recommended one.
2. Transparent Sticker Paper
This special paper is essential for creating clear stickers. It is designed to work seamlessly with thermal printers, ensuring high-quality, vibrant prints. Be sure to choose a brand that offers durable and clear sticker paper, as this will directly affect the final appearance of your stickers.
3. Design Tool or App
You’ll need software or an app to design your stickers. Look for one that offers a variety of templates and customization options. Some apps are specifically tailored for sticker design, featuring easy-to-use interfaces and a wide range of creative tools. If you have owned a thermal printer from Munbyn, then you are suggested to download the Munbyn app. You can then explore different templates to find one or add your own creation that suits your needs.
4. Other Tools
Scissors, a ruler, and a clean work area will also come in handy. Having these additional tools on hand will make your sticker-making process smoother and more enjoyable.
Step 2 Choose a Template or Custom Design
Next, you’ll need to decide on the design for your stickers. You can either choose a pre-made template or create a custom sticker. Many thermal printer suppliers, including MUNBYN, provide design apps that offer a variety of templates. These apps make it easy to drag and drop elements until you have the perfect design. If you prefer a custom design, you can start from scratch using the same app. This allows you to tailor the stickers exactly to your liking, whether you’re adding text, images, or both.
Step 3 Setup the Printer
Once your design is ready, the next step is to set up your thermal printer. Follow these simple steps:
1. Unbox the Printer - Carefully take the printer out of its box and remove any protective materials.
2. Quick Guide and User Manual- Refer to the enclosed quick guide and user manual for specific instructions and troubleshooting tips.
3. Install the Driver - Connect the printer to your computer via USB or Bluetooth and install the necessary drivers.
4. Load the Paper - Place the transparent sticker paper into the printer, ensuring it’s aligned correctly.
With the printer set up, you’re almost ready to print your stickers.
Step 4 Print a Perfect Transparent Stickers
Before printing your final designs, it’s a good idea to run a test print. This helps ensure everything is set up correctly and looks as you’d expect. Once you’re satisfied with the test print, go ahead and print your stickers. If you're not happy with the outcome, adjust your design or printer settings as needed and try again.
Here’s a video tutorial for the quick use of the MUNBYN thermal printer:
Conclusion
Making clear and transparent stickers at home is an easy process when you have the right tools and know-how. From understanding what transparent stickers are to learning how to create them in four easy steps, this guide has covered everything you need to get started. So, gather your materials, fire up your thermal printer, and start creating stunning transparent stickers today!
Here’s the best part: Use the limited-time code MY06 at checkout and get an extra 6% off your MUNBYN purchase!


