How to Make Spice Labels? (A Step-by-Step Guide)

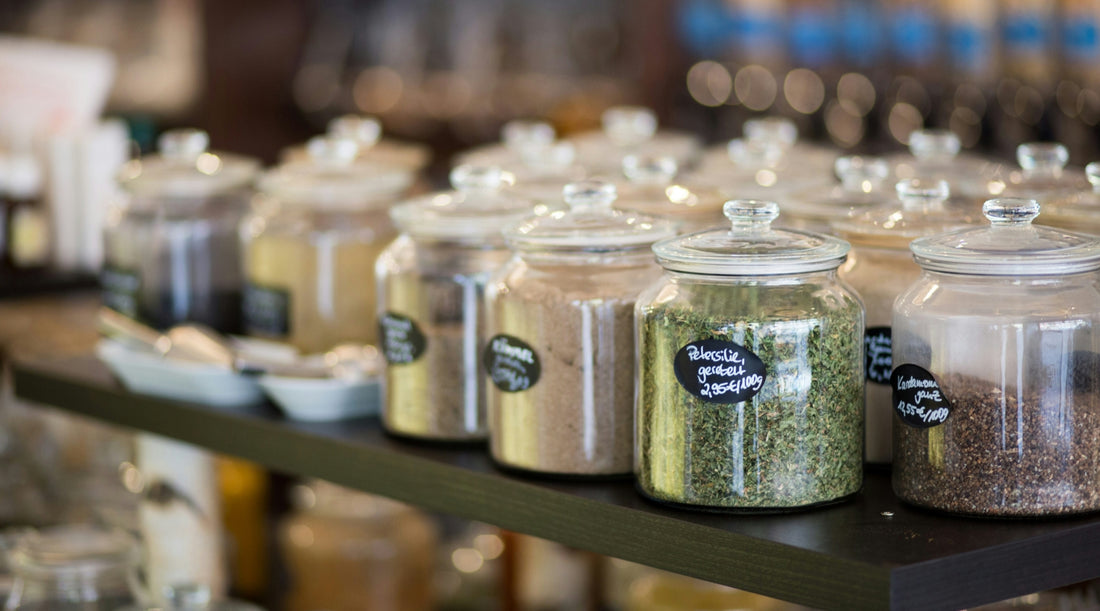
In the culinary world, spice labels play an essential role in keeping your kitchen orderly and efficient. They not only help you quickly identify each spice but also add a touch of personal style to your space. The article is about how you can create custom spice labels, adding both functionality and charm to your cooking area.
What are spice labels?
Spice labels are small tags or stickers that are affixed to spice jars or containers. They typically feature the name of the spice and sometimes additional information like expiration dates or origin. These labels are crucial for anyone looking to maintain an organized pantry and simplify their cooking process.

Primary Purposes of Spice Labels
Spice labels play an important role in kitchen organization and usability. The key functions of spice labels include:
- Identification: Help keep your spice rack or drawer organized and identify the contents of each jar, so you can quickly find the spice you need while cooking.
- Aesthetics: Enhance the look of your kitchen by creating a uniform appearance for your collection of spice jars.
- Efficiency: Save time by avoiding the need to open each jar to smell or taste the contents when searching for a particular spice.
- Safety: Prevent confusion and ensure that you're using the correct spice, which is particularly important for spices that look similar but have very different flavors or heat levels.
How to make spice labels?
Creating custom spice labels can be an enjoyable process that adds personality to your kitchen. Here's a guide on how you can do it:
1. Measure Your Jars
Ensure that your labels will fit by accurately measuring the surface area of your jars where you want to apply the labels. Here's a quick guide to help you measure your jars:
Understanding Typical Spice Jar Dimensions
- Small Jars: These typically range from 1.5 to 2 inches in diameter and 3 to 4 inches in height. They usually hold about 1 to 2 ounces of spices.
- Medium Jars: A medium jar might be around 2 to 2.5 inches in diameter and 4 to 5 inches tall, holding approximately 2 to 4 ounces of spices.
- Large Jars: Larger jars are often 2.5 to 3 inches in diameter and may stand 5 to 6 inches tall, suitable for 4 to 6 ounces or more.

Steps to Measure Your Spice Jars
- For Diameter: Use a flexible measuring tape or a piece of string to measure the circumference of the jar, then divide by π to find the diameter. This will help you understand how wide your label can be.
- For Height: Measure the space between the bottom of the lid and the bottom of the jar where you want the label to sit. This tells you the maximum height for your label.
Confirm Label Dimensions for Spice Jars
Once you have your jar measurements, you can decide on the label size. For small to medium jars, a common label size might be around 1.5 x 2 inches. If your jars are larger, or if you prefer more space to include additional details on your labels, you might choose sizes such as 2 x 3 inches or even larger, such as 4 x 6 labels. A popular choice for many users is white thermal labels, particularly the 2.25" x 1.25" size, which offers a perfect balance of space and readability. If the aforementioned label size isn't suitable for your jar, you can use a Bluetooth label maker to create one that fits perfectly.

Remember that the label should fit comfortably on the jar's flat surface without wrapping too far around the sides (to keep the text easily readable from one angle). Additionally, leave a little margin around the edges of the label for aesthetic appeal and to ensure that the entire label adheres well to the jar.
2. Select Your Material
Spice labels can be handwritten or printed and come in various designs, shapes, and sizes to suit personal preferences and match the style of the kitchen or the containers they are adhered to. Some people choose to make their labels for a personalized touch, while others purchase pre-made labels or label sets. Here's a guide for each situation:
For a minimalist look when writing directly on paper- Fine-tip Permanent Marker: Choose a high-quality fine-tip permanent marker that provides a clean and precise line. Black ink is typically the most versatile and visually striking against white paper.
- Premium Paper: Select a heavy-weight, acid-free paper that will not bleed through when written on with a marker pen. This will ensure a more polished appearance.
- Cleartape: Secure the labels in place with transparent tape for added protection against moisture and frequent handling.
For better saving and customized labeling effectively
- Adhesive Labels: Choosing adhesive labels for a spice bar involves considering both aesthetic appeal and practicality, as these labels need to withstand certain conditions like exposure to air,heat, and potential moisture. Water-resistant labels are ideal since spices can be messy and containers might be handled with wet hands or cleaned regularly. Moreover, opting for a matte finish is generally used to give a rustic, elegant appearance, enhancing the visibility of surface details under bright lighting conditions.
- Designing Software: Many software suites and label manufacturers offer free templates compatible with their label products which can help you design labels, such as Canva, Adobe Illustrator, or the Munbyn Print App.
- Printers Available: When choosing a printer for spice labels, there are several factors to consider to ensure you get the right one for your needs. Here's a guide to selecting a suitable printer for printing spice labels.
- Durability of Ink/Print: Since spice labels may be exposed to kitchen environments, you'll want a printer that uses water-resistant and smudge-proof ink.
- Printer Type: Inkjet Printers are suitable for high-quality color printing and can handle a range of label materials. Laser printers are excellent for producing waterproof and heat-resistant labels quickly. In comparison, direct thermal label printers react to heat without ink or toner to print durable labels.
- Volume Capacity: Consider how many labels you will be printing. For higher volumes of label printing, consider a thermal label printer. While the initial cost may be higher, they are economical over time because they do not require ink or toner.
3. Design Your Labels
Designing a label with a minimalist look requires a focus on simplicity, clean lines, and the essentials. Writing directly on the lid of a jar with a marker pen is a practical and minimalist approach to labeling, especially if you want to quickly identify the contents from above.
When writing directly on paper labels, you'll want to prioritize legibility and uncluttered design. If you're handwriting, keep your style simple and legible. A straightforward, all-caps block lettering often aligns well with a minimalist aesthetic. Ensure consistency in font size and style across all your labels. Since kitchen environments can be messy, consider covering your labels with clear tape or a transparent adhesive film to protect them from spills and stains.
For adhesive labels, you can utilize Canva, or Munbyn Print App to create custom labels. With its intuitive interface, you can design labels that reflect your style or match your kitchen's theme, incorporating text, icons, or colors. Here is a step-by-step guide to customize your special spice labels:
- Open the programand create a new document matching the size of your labels.

- Use the measurements from your containers to create a label design space within the program.
- Choose a font style and size that is legible and fits the aesthetic of your environment.

- Add graphic elements if desired, such as illustrations of herbs or spices, borders, or background colors.

- Input the names of each spice. Consider including additional information like expiration dates, origin, or suggested uses.
4. Printing Your Labels
Once your designs are finalized, it's time to bring them to life using a versatile printer. When deciding between printer types, reflect on your production volume, the environmental conditions the labels will be exposed to, the importance of color and image quality, and the operating costs.
If you value print quality and color detail and don't have massive printing needs, an inkjet printer might be the best fit. For larger-scale operations that prioritize speed and durability over full-color graphics, a laser or thermal label printer could be more appropriate.
Remember that before printing on your adhesive labels, print a test page to ensure your design aligns correctly with your label sheets.
5. Apply the Label
Applying labels to spice jars or any type of jar is a simple task if done carefully. Here’s a step-by-step approach:
- Prepare the Surface: Ensure that the jars are clean, dry, and free from dust or oily residues. Wipe them down with alcohol if necessary, as this removes oils that could prevent the labels from adhering properly.
- Cut the Labels (If Necessary): If you printed the labels on standard paper and need to cut them out, use scissors or a craft cutter for precise edges. If you laminated the labels with clear tape or self-adhesive laminating sheets, cut around the edges leaving a small margin to ensure the protection stays sealed.
- Peel and Position: If using adhesive sticker labels, peel the backing off one label at a time, being careful not to touch the adhesive too much. If using paper labels, apply glue or double-sided tape to the back. Hold the label over the desired spot on the jar without touching it to the surface to get the positioning right.
- Apply the Label: Start applying the label from one side, slowly smoothing it onto the jar's surface. Press out any air bubbles as you go. You can use a flat tool like a credit card to help with this. If the label isn't positioned correctly, you may be able to carefully peel it off and reapply if the adhesive hasn't been set yet.
- Allow to Set: Let the labels sit undisturbed for a short time to allow the adhesive to bond well with the jar surfaces before handling them too much.

Tips for Making Spice Labels
Making your spice labels can be a rewarding and creative task. Here are some tips to help you create functional and beautiful labels for your spice jars:
- Choose the Right Size: Measure your spice jars before creating labels to ensure they fit perfectly without overlapping edges or covering important details like expiry dates.
- Select a Readable Font: Legibility is vital when it comes to label design. Choose simple, clear fonts that are easy to read at a glance. Avoid decorative fonts that may look pretty but are difficult to decipher quickly.
- Use High-Contrast Colors: Make sure the text stands out against the background color of the label for easy reading. White text on a dark background or black text on a light background usually works well.
- Keep It Consistent: Maintain a uniform look across all your spice labels by using the same font size, style, and color scheme. Consistency will give your spice rack a neat and organized appearance.
- Make Them Informative: In addition to the name of the spice, consider including information like origin, best-before date, or suggested uses if there’s enough space.
Wrap up
In summary, crafting your spice labels is a simple yet transformative project for your kitchen. By carefully measuring your jars, selecting suitable materials, designing personalized labels through the designing software, and printing them with a high-quality printer, you'll achieve a practical and polished spice collection.
Take control of your seasoning situation and add a touch of flair with customized spice labels. Discover the ease and elegance of Munbyn's labeling offerings, featuring a selection of waterproof labels in various sizes. These versatile options are perfect for kicking off your spice labeling journey with style!

